Reflective window film is an innovative solution for homeowners and interior designers looking to enhance privacy, improve energy efficiency, and add a decorative touch to their spaces. Understanding how to properly use reflective window film can transform any room, offering a stylish yet functional upgrade. This guide will walk you through the essential steps for using reflective window film effectively, ensuring you maximize its benefits and achieve the best results for your projects.
Understanding Reflective Window Film
Reflective window film is a type of window treatment that has a metallic finish, which reflects light and reduces glare. It offers several key benefits:
- Privacy: Reflective window film enhances privacy by making it difficult for people outside to see inside during the day, while still allowing you to enjoy natural light.
- Energy Efficiency: By reflecting sunlight, this film reduces heat gain, helping to maintain a comfortable indoor temperature and potentially lowering energy bills. According to the U.S. Department of Energy, window films and other window attachments can significantly improve overall energy performance.
- Aesthetic Appeal: Available in various colors and designs, reflective window film can serve as a decorative element, enhancing the visual appeal of your interiors.
Preparing for Installation
Gather the Necessary Materials
Before you start the installation, ensure you have all the necessary materials on hand. This includes:
- Reflective window film
- Spray bottle filled with a soapy water solution
- Squeegee or a similar tool for smoothing out the film
- Utility knife for trimming excess film
- Tape measure
- Lint-free cloth

Measure Your Windows
Accurate measurements are critical to ensure the film fits perfectly. Measure the width and height of each window where you plan to apply the film. It’s advisable to add an extra inch to each measurement to allow for adjustments during installation.
Clean the Windows
Thoroughly clean your windows before application. Use a glass cleaner or the soapy water solution to remove dirt, dust, and any residues. A clean surface is essential for the film to adhere properly and to avoid bubbles or wrinkles.
Installing the Reflective Window Film
Cut the Film to Size
Using the measurements you took earlier, cut the reflective window film to size. Be sure to leave a little extra on each side to facilitate adjustments. A sharp utility knife will help you achieve precise cuts.
Wet the Window Surface
Spray the soapy water solution generously onto the window surface. The wet surface allows you to reposition the film as needed during application.
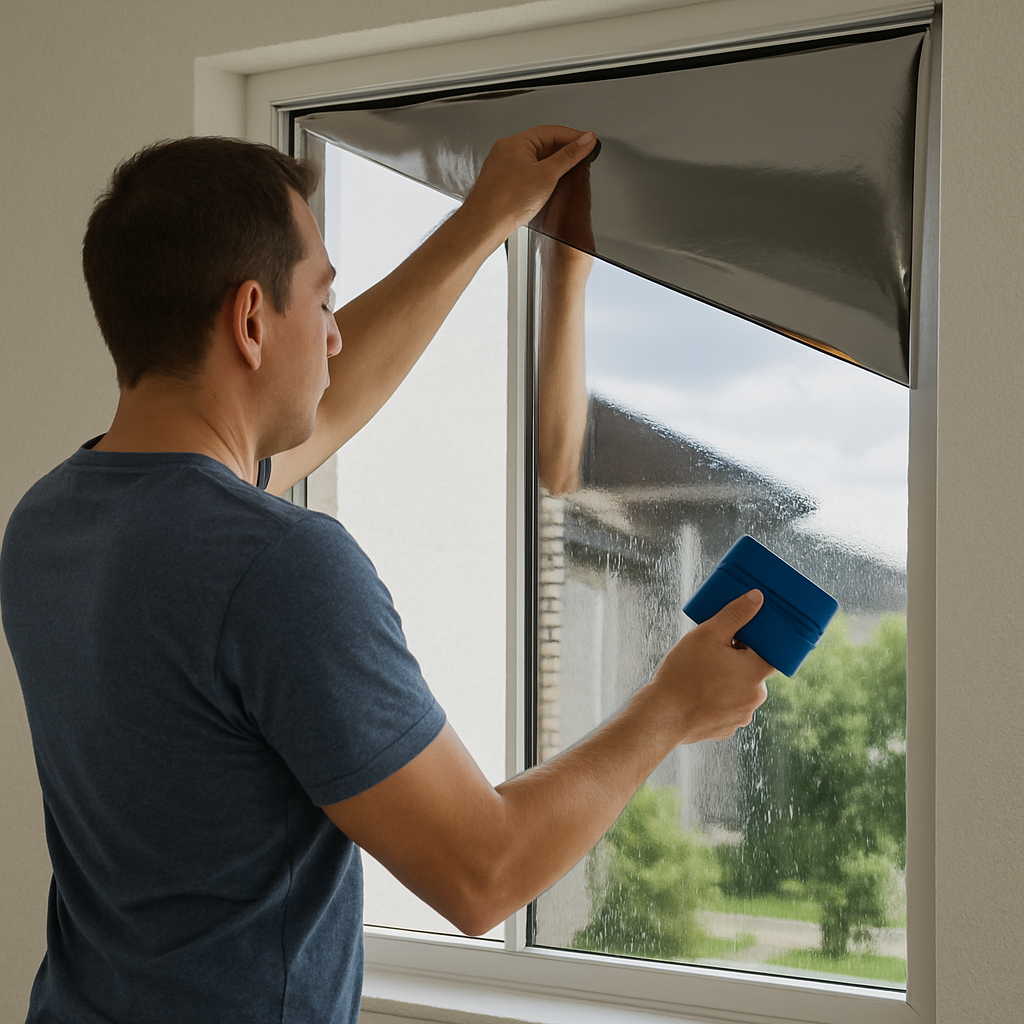
Apply the Film
- Peel Off the Backing: Carefully peel the backing from the reflective window film, exposing the adhesive side. This is best done with two people to prevent the film from sticking to itself.
- Position the Film: Align the top edge of the film with the top of the window. Allow the excess film to hang over the sides and bottom.
- Smooth the Film: Starting from the center, use a squeegee to press the film onto the window. Work your way outward to remove air bubbles and excess water.

Photo by William F. Santos on Unsplash
Trim Excess Film
Once the film is smoothly applied, use the utility knife to trim any excess material along the edges. Be cautious to avoid cutting into the window frame or scratching the glass.
Post-Installation Care
Allow Time to Cure
After installation, give the film time to cure. It usually takes about a week for the adhesive to fully bond to the window. During this time, avoid cleaning the film or getting it wet.
Regular Maintenance
To maintain the appearance and longevity of your reflective window film, clean it regularly with a soft, damp cloth. Avoid using abrasive materials or harsh chemicals that could damage the film.
Advanced Tips for Optimal Results
Choose the Right Type of Film
Reflective window films come in various shades and levels of reflectivity. Consider your specific needs—such as privacy, energy efficiency, or decorative appeal—when selecting a film. Privacy window films are ideal for rooms requiring more seclusion, while decorative window films add a stylish touch. If improving thermal performance is your primary goal, consider selecting an energy-efficient window tint to further enhance comfort and savings.
Consider Professional Installation
For large windows or complex installations, you may want to consider hiring a professional. They have the expertise and tools to ensure a flawless application, saving you time and potential frustration.
Evaluate Lighting Conditions
Keep in mind that the effectiveness of reflective window film can vary with lighting conditions. During nighttime, when interior lights are on, the film may not provide the same level of privacy. Consider additional window treatments if nighttime privacy is a concern. For more guidance on overall window efficiency improvements, visit ENERGY STAR.
Conclusion
Reflective window film is a versatile and cost-effective solution that offers privacy, energy savings, and aesthetic enhancement. By following these essential steps and tips, you can successfully apply reflective window film and enjoy its numerous benefits. Whether you’re an interior designer aiming to offer clients innovative solutions or a homeowner looking to elevate your living space, reflective window film is a valuable addition that delivers on both form and function.